Category: Proper Plates

  • Beef Stir-Fry That Doesn’t Wait For Permission

    Beef Stir-Fry That Doesn’t Wait For Permission

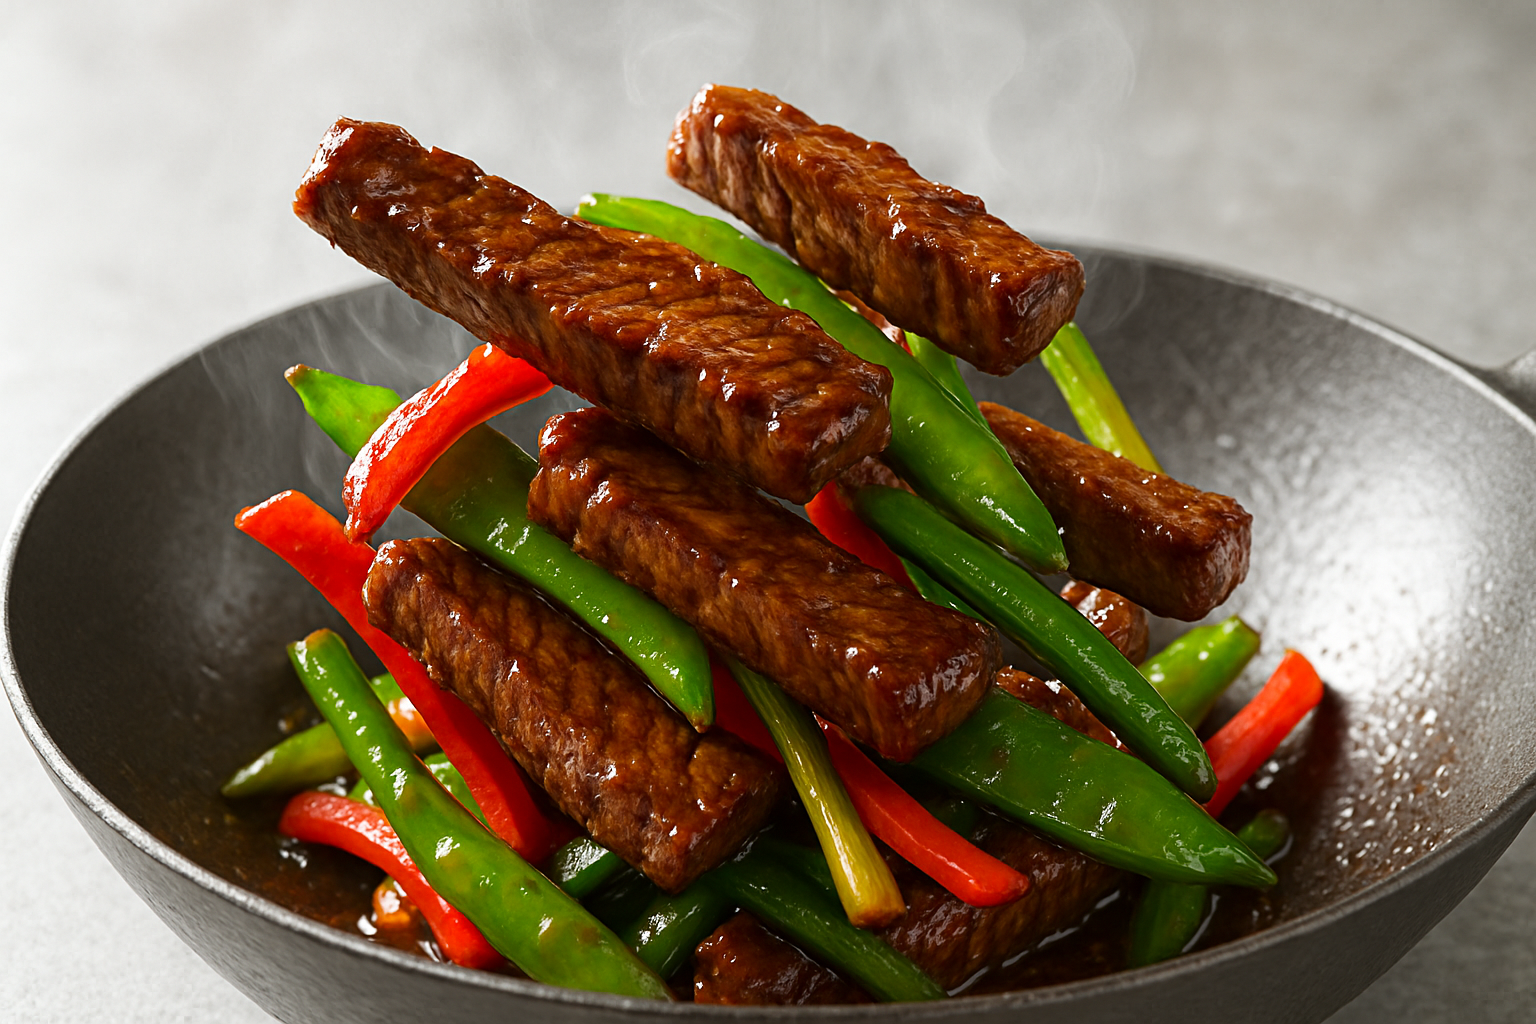
    This isn’t a stir-fry. It’s a full-throttle punch of garlic, heat, and umami that hits hard and doesn’t stop to apologise. Thin-sliced sirloin, seared at fire-level heat till it bites back, then slammed into a wok full of fresh veg, garlic thunder, and a sauce that glazes like lacquer. It’s sticky. It’s sharp. It’s slicked in soy and sugar and kissed with sesame like a hit of smoke. This isn’t one of those “gentle midweek” dinners. This is beef with attitude. Snap. Sizzle. Swing. Done.

    Ingredients

    Serves 2

    350g sirloin steak, sliced into thin strips 1 tbsp cornflour 1 tbsp light soy sauce Pinch of white pepper 1 tbsp groundnut oil (or other high-heat oil) 1 red pepper, thinly sliced 100g mangetout 2 spring onions, chopped 2 garlic cloves, grated

    For the sauce:

    2 tbsp dark soy sauce 1 tbsp oyster sauce 1 tsp sesame oil 1 tsp soft brown sugar

    Equipment needed

    Sharp knife and board Mixing bowl Wok or large non-stick frying pan Tongs or spatula Grater or garlic press Small bowl (for sauce)

    Step-by-step method

    1. Prep the steak.

    Slice 350g of sirloin steak thinly against the grain — 5mm strips max. Toss with 1 tablespoon cornflour, 1 tablespoon light soy sauce, and a pinch of white pepper. Let it sit for 10 minutes while you prep the rest. This marinade gives you that velvety finish and deep seasoning.

    2. Mix the sauce.

    In a small bowl, combine 2 tablespoons dark soy sauce, 1 tablespoon oyster sauce, 1 teaspoon sesame oil, and 1 teaspoon brown sugar. Stir until smooth. Set aside — you need it ready because this stir-fry moves fast.

    3. Heat the wok.

    Get your wok stupid hot — it should be almost smoking. Add 1 tablespoon groundnut oil and swirl to coat. Immediately add the marinated steak in a single layer. Let it sear, untouched, for 45 seconds so it crusts. Stir-fry another 45 seconds until charred but still juicy. Remove to a plate — don’t overcook it.

    4. Stir-fry the veg.

    In the same wok (still hot), add a splash more oil if needed. Throw in 1 sliced red pepper, 100g mangetout, 2 chopped spring onions, and 2 grated garlic cloves. Stir-fry for 2 minutes on high heat. Keep it moving — you want blistered edges and crunch, not limp veg.

    5. Bring the beef back.

    Return the cooked steak to the wok. Stir it through the veg for 30 seconds — let that heat reawaken the beef.

    6. Sauce and sear.

    Pour in your prepared sauce and toss everything together fast and hard. The sugar will start to caramelise, the soy will thicken, and the whole thing should go glossy and sticky in under a minute. If it’s dry, add a tablespoon of water. If it’s too wet, stir another 30 seconds till it tightens.

    7. Serve immediately.

    Spoon the stir-fry into warm bowls or over freshly steamed rice or noodles. Finish with an extra sprinkle of spring onion, sesame seeds, or a splash of chilli oil if you’re feeling dangerous.

    Serving tips

    Serve hot over jasmine rice, egg noodles, or straight out of the wok like it’s a street corner in Bangkok. Want more punch? Add fresh chilli slices or a drizzle of chilli crisp before serving. Fancy contrast? Top with crushed peanuts or a quick cucumber salad to cool the burn.

    Chef’s notes

    Steak slicing matters. Always cut against the grain — it keeps the beef tender even when cooked at high heat. And go thin — thick chunks turn chewy.

    Cornflour is the cheat code. It gives you that velvety finish and helps form the crust when seared. Without it, the beef won’t glaze properly.

    Wok heat is non-negotiable. This dish only works at high heat. If your wok isn’t hot enough, the beef will steam, not sear. Preheat it till it smokes.

    Sauce balance is key. The combo of dark soy, oyster sauce, sesame oil, and brown sugar is a tightrope of umami, sweetness, and depth. Don’t mess with the ratios unless you know what you’re doing.

    Want more veg? Toss in pak choi, mushrooms, or shredded cabbage. Just keep it quick and crunchy. Soft veg ruins the bite.

    Prep before you cook. This is not a “chop as you go” dish. Have everything ready, because once the wok heats up, it’s full speed to flavour town.

    Final thought

    This isn’t dinner — it’s a sirloin stir-fry that grabs you by the collar and makes you pay attention. It’s bold, fast, and brutally flavourful. Every bite crunches, snaps, sizzles, and seduces. It doesn’t beg for approval. It doesn’t wait for compliments. It just wins. Fork in. Head down. Let the wok do the talking.

    Health stats (per serving)

    Each portion delivers roughly 2,400kJ (570kcal), with 27g fat, 9g saturates, 8g sugars, and 1.8g salt. You’ll get 40g protein, 25g carbohydrates, and around 4g fibre — a high-protein, high-flavour meal built for bite, not bloat.

    Disclaimer

    Every effort has been made to ensure the accuracy and clarity of this recipe. However, all individuals are responsible for verifying the ingredients, techniques, and methods they use. Always check packaging labels for the most up-to-date information regarding allergens, cross-contamination risks, and suitability for specific dietary needs, including gluten-free, nut-free, dairy-free, vegetarian, or vegan requirements.

    Nutritional information provided is estimated for guidance only and may vary depending on portion size, specific brands, or substitutions used. It should not be relied upon as medical or nutritional advice. If you have any allergies, intolerances, medical conditions, or dietary concerns, consult a qualified health professional before preparing or consuming any recipe on this site.

    By following this recipe, you acknowledge that you do so at your own risk. The site, its writers, and contributors are not liable for any adverse reactions, ingredient misinterpretations, or accidents in the preparation or consumption of any dishes.

    For full details, please refer to the site’s complete disclaimer and terms of use.

  • Creamy Mushroom Pasta That Seduces You

    Creamy Mushroom Pasta That Seduces You

    This isn’t dinner. This is temptation, twirled around a fork. Thick ribbons of tagliatelle tangled in a velvety garlic cream, draped in buttery mushrooms, kissed with parmesan, and laced with nutmeg. It’s rich. It’s earthy. It smells like a secret you’d keep from your partner. One mouthful in, and you’re not just eating — you’re falling. This dish doesn’t ask for permission. It seduces. Every bite is a slow, luxurious melt that wraps around your senses and doesn’t let go. It’s indulgent, addictive, and dangerously good — pasta with no moral compass. Let’s cook it like you mean it.

    Ingredients

    Serves 2

    250g tagliatelle Sea salt, for pasta water 30g unsalted butter 2 shallots, finely chopped 3 garlic cloves, crushed 300g chestnut mushrooms, thinly sliced 150ml double cream 30g parmesan cheese, grated (plus extra to serve) Splash of reserved pasta water Freshly ground black pepper Pinch ground nutmeg

    Equipment needed

    Large saucepan for pasta Large frying pan or sauté pan Sharp knife and chopping board Garlic press or microplane Wooden spoon or spatula Cheese grater Measuring jug

    Step-by-step method

    1. Boil the pasta.

    Fill a large saucepan with water, bring it to a roaring boil, and salt it generously — think seawater. Add 250g of tagliatelle and cook until al dente, usually 7–9 minutes depending on brand. Stir occasionally to prevent sticking. Reserve a small jug of pasta water before draining. This starchy gold is key to silky sauce.

    2. Start the base.

    While the pasta cooks, melt 30g of unsalted butter in a large frying pan over medium heat. Add the finely chopped shallots and sauté for 3 minutes until soft and translucent. You want them melting, not browning — this is about building subtle sweetness and depth.

    3. Add the garlic.

    Crush or finely mince 3 garlic cloves and stir them into the pan. Cook for 1 minute until fragrant. Don’t let them burn — burnt garlic will ruin the entire dish. Keep it moving.

    4. Sauté the mushrooms.

    Turn up the heat to high. Add 300g of thinly sliced chestnut mushrooms. They’ll release water at first — that’s normal. Keep cooking, stirring often, for around 6 minutes until the water evaporates, and the mushrooms turn golden, shrunken, and intense. You want deep colour and a rich, meaty aroma.

    5. Build the cream.

    Lower the heat slightly and pour in 150ml of double cream. Stir immediately, letting it bubble gently. Add 30g of grated parmesan cheese, a good grind of black pepper, a pinch of ground nutmeg, and a splash of the reserved pasta water. The sauce should start to thicken, gloss, and coat the back of a spoon.

    6. Marry the pasta.

    Drain the pasta and add it straight into the mushroom cream. Use tongs to lift and fold the pasta through the sauce. Add another splash of pasta water if needed to loosen it. Toss until every ribbon is glazed in that garlic-parmesan luxury. Don’t rush — this is the moment everything becomes one.

    7. Taste and adjust.

    Taste the sauce. Add salt if needed, another pinch of nutmeg if you want more warmth, or more cheese if you’re a hedonist. You’re in control now — make it yours.

    8. Plate with purpose.

    Twirl generous heaps of pasta into warm bowls. Top with extra parmesan, a few cracks of black pepper, and a glisten of olive oil if you like. Serve immediately — this dish doesn’t wait around.

    Serving tips

    Pair with a glass of chilled white wine — a buttery Chardonnay or a dry Pinot Grigio. Add a handful of rocket tossed in lemon juice if you want contrast. Craving even more indulgence? Shave over fresh truffle or drizzle with truffle oil before serving. Want crunch? Toasted pine nuts or crushed walnuts scattered on top bring texture without overpowering the sauce.

    Chef’s notes

    Mushroom mastery. Chestnut mushrooms are ideal — they bring more flavour than button mushrooms and hold their shape. Slice them evenly so they cook consistently. Want to boost umami? Add a teaspoon of white miso paste or a splash of soy sauce with the cream — it deepens the flavour beautifully.

    Butter matters. Use real, unsalted butter. You want full-fat richness to bind the garlic and shallots into a proper base. This isn’t the time for margarine or shortcuts.

    Nutmeg? Always. It’s not just for baking. A pinch of nutmeg brings out the earthiness of the mushrooms and rounds out the cream. It should sit in the background like a whisper — subtle, but necessary.

    Pasta water is magic. Don’t skip it. The starch in that water helps emulsify the sauce, making it cling to the pasta rather than slide off. Add a splash at a time — the sauce should be creamy, not soupy.

    Customisations. Add sautéed spinach, wilted kale, or frozen peas for a touch of green. Want protein? Stir in shredded roast chicken or pan-fried pancetta. Going vegan? Swap the cream for oat cream and the parmesan for nutritional yeast or a vegan hard cheese. It won’t be identical — but it will still seduce.

    Reheating? No. This dish is best fresh. Leftovers can be reheated gently with a splash of milk, but the sauce may split. If you want to prep ahead, make the mushroom base and add cream and pasta when ready to serve.

    Final thought

    This isn’t a quick fix. This is slow, deliberate indulgence. It wraps around your fork like silk, coats your tongue in garlic and cream, and lingers with earthy heat. It’s the kind of pasta you think about long after it’s gone. One bite in and it’s no longer food — it’s flirtation. You didn’t cook. You seduced. You made pasta with intent. And now, you eat it like a secret.

    Health stats (per serving)

    Each bowl contains around 2,450kJ (585kcal), with 35g fat, 20g saturates, 4.2g sugars, 1.3g salt, 45g carbohydrates, 14g protein, and 4.8g fibre. Rich, comforting, and completely satisfying — this is indulgence with just enough backbone to justify it.

    Disclaimer

    Every effort has been made to ensure the accuracy and clarity of this recipe. However, all individuals are responsible for verifying the ingredients, techniques, and methods they use. Always check packaging labels for the most up-to-date information regarding allergens, cross-contamination risks, and suitability for specific dietary needs, including gluten-free, nut-free, dairy-free, vegetarian, or vegan requirements.

    Nutritional information provided is estimated for guidance only and may vary depending on portion size, specific brands, or substitutions used. It should not be relied upon as medical or nutritional advice. If you have any allergies, intolerances, medical conditions, or dietary concerns, consult a qualified health professional before preparing or consuming any recipe on this site.

    By following this recipe, you acknowledge that you do so at your own risk. The site, its writers, and contributors are not liable for any adverse reactions, ingredient misinterpretations, or accidents in the preparation or consumption of any dishes.

    For full details, please refer to the site’s complete disclaimer and terms of use.

  • Thai Basil Chicken

    Thai Basil Chicken

    Let’s get one thing straight — this isn’t your average stir-fry. This is high-heat, high-flavour, wok-charred brilliance, born in Bangkok backstreets and built to slap your tastebuds awake. Thai basil chicken, or pad kra pao gai, is the kind of dish that comes together so fast it feels like a trick. But don’t be fooled — it’s all about precision. Timing. Balance. Fire. You’re not throwing ingredients around. You’re orchestrating a blast of heat, salt, sweetness, and fragrance that hits hard and leaves you grinning.

    It starts with a fiery paste — garlic and bird’s eye chillies smashed into a punchy, nose-tingling base. Then comes chicken thigh, chopped fine so it browns fast and stays juicy. Next, a trio of sauces — light soy for seasoning, dark soy for colour and depth, fish sauce for funk. A teaspoon of sugar rounds it out. Finish it with a heroic handful of Thai basil, folded in off the heat so it doesn’t burn — it just wilts and floods the pan with that wild aniseed aroma.

    Serve it over hot jasmine rice with a crispy fried egg — yolk oozing into every corner — and you’ve got ten minutes of work for a result that tastes like it took ten years to perfect. This is weekday cooking that doesn’t compromise. It’s fast. It’s furious. And it absolutely flies.

    INGREDIENTS

    (Serves 2)

    300g boneless, skinless chicken thighs, finely chopped 3 cloves garlic, peeled 2 red bird’s eye chillies (adjust to heat preference) 1 tablespoon vegetable oil (rapeseed or sunflower) 1 tablespoon light soy sauce 1 tablespoon dark soy sauce 1 teaspoon fish sauce 1 teaspoon caster sugar 1 tablespoon water 1 large handful Thai basil leaves (not sweet basil) Cooked jasmine rice, to serve 2 eggs (optional, for crispy fried eggs)

    EQUIPMENT NEEDED

    Sharp knife Chopping board Wok or large frying pan Pestle and mortar (or small food processor) Spatula or wooden spoon Serving bowls

    STEP-BY-STEP METHOD

    1. Smash the garlic and chillies

    Start by peeling the garlic and chopping it roughly. Do the same with the red bird’s eye chillies. Now get brutal. Use a pestle and mortar to smash them together with a small pinch of salt. You’re not looking for a smooth paste — just a rough, chunky mash that releases the oils and aroma. This is the base of your flavour bomb.

    No mortar and pestle? Use the flat side of a knife to crush them into a paste on the chopping board. Just don’t blend — you want texture, not baby food.

    2. Prep the chicken

    Use chicken thighs — they’ve got more flavour and they stay juicy under high heat. Chop them fine, but not to mince. You want small, irregular pieces that’ll catch the heat and develop golden edges. Keep them in a bowl ready to go.

    3. Fry the chilli-garlic paste

    Heat the vegetable oil in a wok or large non-stick frying pan over medium-high heat. Once hot, toss in the garlic-chilli paste. Stir-fry for about 30 seconds. You want to hear it sizzle and smell it immediately — that’s when the oils release and start building depth.

    Keep it moving. Burnt garlic is bitter and unforgivable. If it colours too fast, pull the pan off the heat for a second.

    4. Add the chicken and cook hard

    Throw in the chopped chicken. Turn the heat up to high. Stir constantly, breaking the chicken apart so it cooks evenly. After 5 minutes, it should be browned in places, fully cooked through, and smelling amazing. If the pan’s dry, don’t be afraid to add a splash of oil or water to keep things moving.

    5. Season with the sauces

    Once the chicken is golden and nearly cooked, add your sauces: 1 tablespoon light soy, 1 tablespoon dark soy, 1 teaspoon fish sauce, and 1 teaspoon sugar. Toss it all together fast. The dark soy adds colour and a little sweetness; the fish sauce brings depth and salt; the sugar balances everything out.

    Add a tablespoon of water to loosen the sauce slightly and help it coat every piece of chicken.

    Cook for another 30 seconds so the sauce thickens and glazes the meat. Don’t overdo it — you want the sauce to cling, not pool.

    6. Kill the heat and add Thai basil

    Turn off the heat. Immediately throw in a big handful of Thai basil. Stir it through — the residual heat will wilt it perfectly. You want the leaves vibrant and aromatic, not blackened and sad.

    Thai basil has a sharp, liquorice-like bite that lifts the whole dish. Don’t use Italian basil — it’s completely different. If you can’t get Thai basil, holy basil is even better, if you’re lucky enough to find it.

    7. Serve hot with crispy fried egg

    Spoon the Thai basil chicken over freshly cooked jasmine rice. For the full Thai street food hit, top each bowl with a crispy fried egg: fry eggs in hot oil until the whites are puffed and golden at the edges, yolks still soft and oozy. That rich yolk mingling with the spicy sauce? Game over.

    SERVING TIPS

    Serve immediately while the chicken is hot and the basil is fresh. The egg is optional, but if you skip it, you’re missing a trick — it balances the heat and adds luscious richness. If you’re feeling fancy, garnish with a few extra Thai basil leaves and a crack of black pepper.

    This dish doesn’t need sides — it’s built to stand alone. But if you want to stretch the meal, add a crisp cucumber salad or some stir-fried morning glory.

    CHEF’S NOTES

    The heat:

    Bird’s eye chillies are small but savage. Two give a decent kick without being unbearable. Adjust depending on your tolerance, but don’t remove the chilli altogether — it’s part of the character. And smashing them with garlic releases far more flavour than just slicing.

    The meat:

    Chicken thigh is key. Chicken breast will dry out under high heat and won’t deliver the same flavour. Keep the pieces small and don’t overcrowd the pan — you want fry, not steam.

    The sauce:

    Taste your sauces. Not all soy or fish sauces are created equal. Start with the amounts given, but tweak as you go — if it tastes flat, add more fish sauce. Too sharp? More sugar. Too salty? A splash of water fixes it.

    The basil:

    Thai basil isn’t a garnish — it’s the soul of the dish. Don’t cook it too long or it’ll go limp and dull. Add it at the very end and let the residual heat do the work.

    Make it plant-based:

    Sub in firm tofu or mushrooms instead of chicken. Use a vegan fish sauce alternative or extra soy sauce. The flavour will still slap — it just hits a little differently.

    Batch cooking tip:

    You can prep all the ingredients in advance — even the chilli-garlic paste. But don’t cook until you’re ready to serve. This dish relies on speed and high heat — make it fresh and eat it immediately for best results.

    FINAL THOUGHT

    This is what weeknight cooking should be — fast, filthy, and full of attitude. Ten minutes. One pan. No fuss. And yet the flavour punches way above its weight. Hot. Salty. Sweet. Deeply savoury. With that basil cutting through like a blast of green fire.

    Once you’ve mastered this, you’ll find yourself making it on autopilot. And that’s the danger — you’ll want it every night. No shame in that.

    HEALTH STATS (per serving, without egg)

    Energy: around 1800kJ (approx. 430kcal)

    Fat: 24g

    Saturates: 4.5g

    Sugars: 6g

    Salt: 2g

    Carbohydrates: 12g

    Protein: 38g

    Fibre: 1g

    DISCLAIMER

    Every effort has been made to ensure the accuracy and clarity of this recipe. However, all individuals are responsible for verifying the ingredients, techniques, and methods they use. Always check packaging labels for the most up-to-date information regarding allergens, cross-contamination risks, and suitability for specific dietary needs, including gluten-free, nut-free, dairy-free, vegetarian, or vegan requirements.

    Nutritional information provided is estimated for guidance only and may vary depending on portion size, specific brands, or substitutions used. It should not be relied upon as medical or nutritional advice. If you have any allergies, intolerances, medical conditions, or dietary concerns, consult a qualified health professional before preparing or consuming any recipe on this site.

    By following this recipe, you acknowledge that you do so at your own risk. The site, its writers, and contributors are not liable for any adverse reactions, ingredient misinterpretations, or accidents in the preparation or consumption of any dishes.

    For full details, please refer to the site’s complete disclaimer and terms of use.

  • Crispy Miso Aubergine

    Crispy Miso Aubergine

    Let’s set the record straight — if you still think vegetables are a side act, this dish is here to smack that idea out of your head. This isn’t your limp, lifeless aubergine from a sad salad bar. This is a blistered, bubbling, umami-drenched masterpiece that holds its own against any slab of meat.

    You’re going to take one of the most misunderstood vegetables in the kitchen — aubergine — and turn it into a smoky, sticky, caramelised beast. Deeply roasted until it collapses under a spoon, then glazed in a miso marinade that’s got enough punch to wake up your palate with a slap.

    The key here is technique. Roasting the aubergine cut-side up so the flesh softens while the edges caramelise. Scoring it so every line traps flavour. Then painting on a glaze made with white miso, mirin, soy, rice vinegar, and a whisper of sesame. It’s sweet, sharp, nutty, and fermented — all at once. That bubbling, golden finish? That’s not garnish — that’s intent.

    When it hits the table, it doesn’t whisper “plant-based” — it screams satisfaction. Serve it as a main with jasmine rice or as part of a bigger spread. Just don’t expect leftovers. This is the dish that makes meat-eaters shut up and nod.

    INGREDIENTS

    (Serves 2 as a main or 4 as a side)

    2 medium aubergines 2 tablespoons vegetable oil (rapeseed or sunflower work best) 2 tablespoons white miso paste 1 tablespoon mirin 1 tablespoon rice vinegar 1 teaspoon light soy sauce 1 teaspoon caster sugar 1 teaspoon toasted sesame oil 1 spring onion, finely sliced 1 teaspoon toasted sesame seeds ½ red chilli, finely sliced (optional, for heat and colour)

    EQUIPMENT NEEDED

    Sharp chef’s knife Chopping board Small mixing bowl Baking tray Pastry brush or spoon Oven

    STEP-BY-STEP METHOD

    1. Prepare the aubergines

    Start by preheating your oven to 200°C (fan 180°C). You want consistent, dry heat here — not too aggressive, but enough to give your aubergines some colour without burning the glaze later.

    Take your aubergines and slice them lengthways straight through the stalk. Don’t remove the green tops — they’re not edible, but they help hold the shape. Score the flesh in a deep criss-cross pattern, about 1cm apart, being careful not to cut through the skin. This scoring allows heat and flavour to penetrate deep into the flesh. Think of it like laying tracks for the glaze to follow.

    Now brush the cut surface generously with vegetable oil. Be thorough. Don’t dab. Get that oil into the grooves. Place them cut-side up on a baking tray lined with parchment or foil.

    2. Roast until golden and soft

    Roast the aubergines in the hot oven for 30 minutes. You want them golden, slightly collapsed, and tender right through. The edges should crisp a little, while the inside turns silky. If they still feel firm after 30 minutes, give them another 5. No one wants a chewy aubergine — undercooking ruins the whole thing.

    3. Make the miso glaze

    While the aubergines roast, mix the glaze. In a small bowl, combine 2 tablespoons of white miso paste with 1 tablespoon mirin, 1 tablespoon rice vinegar, 1 teaspoon soy sauce, 1 teaspoon caster sugar, and a teaspoon of toasted sesame oil. Stir until smooth and glossy. The texture should be like warm honey — not too thick, not too runny. Adjust with a splash more mirin if it needs loosening.

    Taste it. It should slap you with sweet, salty, tangy umami. If it doesn’t make your eyebrows lift, tweak it.

    4. Glaze and return to the oven

    Once the aubergines are tender and golden, remove them from the oven. Don’t let them cool — timing is key. While they’re still hot, spoon over the miso glaze. Make sure it seeps into every scored groove and edge. Use the back of a spoon or a pastry brush to spread it evenly.

    Return the tray to the oven for another 10 minutes. This is when the glaze bubbles and caramelises. Keep a close eye in the last few minutes — sugar burns quickly. You want sticky and golden, not scorched.

    5. Finish with garnish

    Take the tray out. Let the aubergines rest for 2 minutes — just enough for the glaze to set slightly. Now hit them with finely sliced spring onion, toasted sesame seeds, and a little chopped fresh red chilli for contrast and heat. If you want to elevate further, add a squeeze of lime or a scatter of crispy shallots.

    SERVING TIPS

    Serve these hot, straight from the tray or plated up on a warm dish. Pair them with jasmine rice, steamed bok choy, or a cold noodle salad. If you’re going full banquet, they sit beautifully alongside grilled tofu, kimchi, or a tangy pickled cucumber.

    These aubergines also work at room temperature — the flavours deepen as they sit. Drizzle with extra sesame oil or soy if you’re serving cold.

    CHEF’S NOTES

    The aubergine:

    Look for firm, shiny aubergines with no bruises. Medium size is ideal — too small, and they dry out; too big, and they get seedy. Scoring is non-negotiable. It helps roast the inside while catching the glaze later.

    The miso:

    White miso is your best friend here — mild, sweet, and complex. Red miso is too strong for this dish. Make sure it’s good quality — cheap miso tastes flat and salty. If you’ve only got dark soy, use half the amount and taste as you go.

    The sesame oil:

    Use toasted sesame oil — the dark, fragrant kind. It brings warmth and depth. Don’t cook with it — it burns easily. It’s for flavour, not frying.

    The glaze:

    Balance is everything. You want sweetness from sugar and mirin, acidity from rice vinegar, and that deep umami punch from the miso. Adjust the ratios depending on your miso’s strength. Always taste and tweak — never glaze blind.

    Garnishes:

    The garnish isn’t an afterthought. The spring onion adds freshness, the sesame seeds give crunch and nuttiness, and the chilli cuts through the richness. Use all three — it makes a difference. And don’t skimp on the chilli if you like a bit of heat.

    Make it a meal:

    This dish holds its own, but you can make it a main event by adding a soft-boiled egg, a scoop of sushi rice, or quick-pickled radish on the side. Want protein? Add grilled tofu or tempeh glazed with the same miso mix. Want crunch? Fried shallots or crushed peanuts take it to another level.

    Make it ahead:

    You can roast the aubergines ahead of time and reheat before glazing. But always glaze and caramelise just before serving — it’s what makes the dish pop. Leftovers keep well for 24 hours in the fridge and reheat beautifully in a hot oven or air fryer.

    FINAL THOUGHT

    This is plant-based cooking without compromise. It doesn’t whisper “healthy” — it roars “flavour.” You’ve got texture, depth, umami, and heat in every mouthful. It’s rich without being heavy. Sticky without being cloying. The kind of dish that makes you scrape the plate clean.

    Once you’ve nailed this, you’ll start seeing aubergines differently. No longer just a filler. They become the centrepiece — bold, indulgent, and absolutely unforgettable.

    HEALTH STATS (per portion, assuming two servings)

    Energy: around 1400kJ (approx. 335kcal)

    Fat: 21g

    Saturates: 2.8g

    Sugars: 9g

    Salt: 1.6g

    Carbohydrates: 20g

    Protein: 5g

    Fibre: 7g

    DISCLAIMER

    Every effort has been made to ensure the accuracy and clarity of this recipe. However, all individuals are responsible for verifying the ingredients, techniques, and methods they use. Always check packaging labels for the most up-to-date information regarding allergens, cross-contamination risks, and suitability for specific dietary needs, including gluten-free, nut-free, dairy-free, vegetarian, or vegan requirements.

    Nutritional information provided is estimated for guidance only and may vary depending on portion size, specific brands, or substitutions used. It should not be relied upon as medical or nutritional advice. If you have any allergies, intolerances, medical conditions, or dietary concerns, consult a qualified health professional before preparing or consuming any recipe on this site.

    By following this recipe, you acknowledge that you do so at your own risk. The site, its writers, and contributors are not liable for any adverse reactions, ingredient misinterpretations, or accidents in the preparation or consumption of any dishes.

    For full details, please refer to the site’s complete disclaimer and terms of use.

    Ready for the next one.