Category: Rise & Dine

  • Ricotta Pancakes With Berries And Maple Syrup

    Ricotta Pancakes With Berries And Maple Syrup

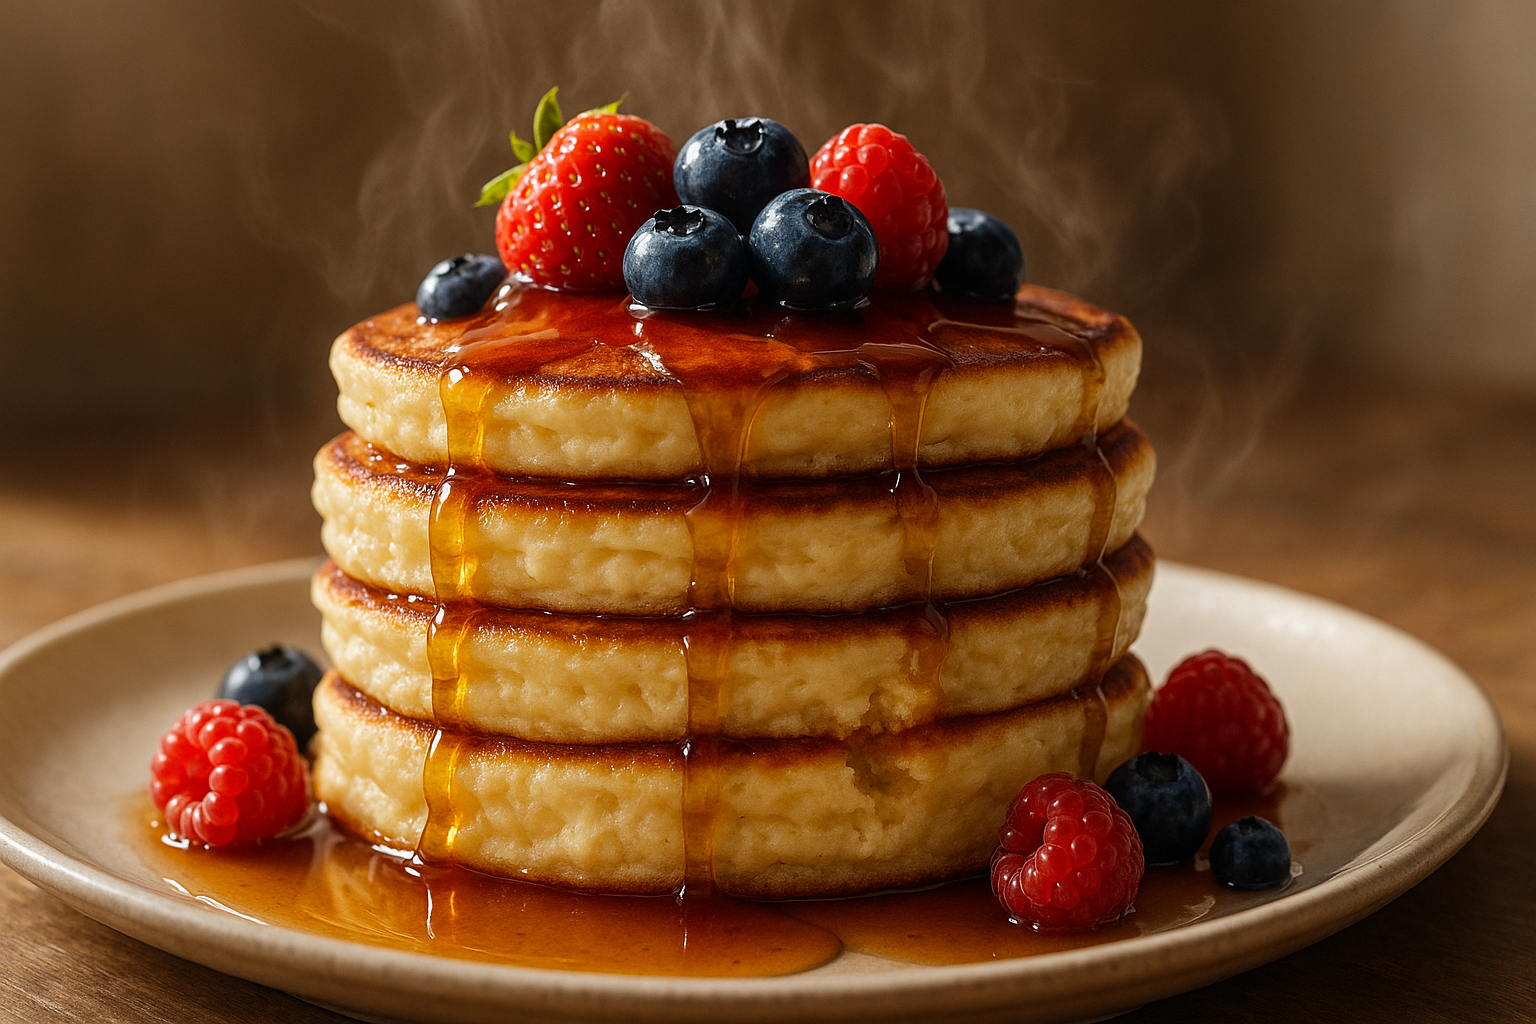
    These aren’t your average pancakes. These are fat, golden, cloud-soft ricotta stacks that eat like cheesecake for breakfast. They’re creamy, thick, and rich — the kind of pancakes you bite into and instantly wonder why all others bother. Lightened with whipped egg white, scented with vanilla, and crowned with fresh berries and hot maple syrup, this is a proper indulgence. Whether you’re nursing a hangover, treating someone special, or feeding your inner child — this stack doesn’t whisper. It seduces.

    Ingredients

    Serves 2 (makes around 6 pancakes)

    125g ricotta cheese 1 egg, separated 100ml whole milk 1 tsp vanilla extract 75g plain flour 1 tsp baking powder Pinch of fine sea salt Butter, for frying Fresh berries (blueberries, raspberries, strawberries), to serve Warm maple syrup, to serve

    Equipment needed

    2 mixing bowls Whisk Sieve Spatula Measuring jug Non-stick frying pan Small ladle or tablespoon Plate for stacking

    Step-by-step method

    1. Separate and prep.

    Crack the egg and separate the white and yolk into two bowls. In the bowl with the yolk, add the ricotta and mash it slightly with a fork to loosen it up.

    2. Make the base batter.

    Add the whole milk and vanilla extract to the ricotta and egg yolk. Whisk until smooth and creamy. Sift in the plain flour, baking powder, and salt. Mix gently until just combined — don’t overwork it. The batter will be thick.

    3. Whip the egg white.

    Whisk the egg white in the second bowl until it forms soft peaks — it should hold shape but still flop at the tip. This is what gives the pancakes their lift.

    4. Fold it in.

    Use a spatula to gently fold the whipped egg white into the thick batter in two stages. Don’t stir — fold gently to preserve air. The finished batter should be pale, fluffy, and airy.

    5. Heat the pan.

    Place a non-stick frying pan over medium heat. Add a small knob of butter and swirl to coat the surface. When it sizzles but doesn’t burn, you’re ready to cook.

    6. Cook the pancakes.

    Spoon in the batter to form small rounds — about 2 tablespoons each. Leave space between them. Cook for 2 minutes or until the bottoms are golden and bubbles start to appear on top. Flip carefully with a spatula.

    7. Finish the flip.

    Cook for another 90 seconds on the second side until golden and puffed. Remove and stack them on a warm plate while you repeat with the rest of the batter, adding a little butter each time.

    8. Serve and dress.

    Top the warm pancake stack with a handful of fresh berries. Drizzle generously with warm maple syrup and serve immediately.

    Serving tips

    Serve these pancakes stacked high with warm syrup trickling down the sides. Add a dollop of whipped cream or Greek yoghurt for extra indulgence. A scattering of toasted nuts or dark chocolate chips takes this to dessert territory. Want something sharper? Spoon over a berry compote or crushed raspberries with lemon juice.

    Chef’s notes

    Ricotta matters. Use full-fat ricotta and drain off excess liquid before using. The thicker the ricotta, the creamier your pancake interior.

    Egg white technique. Don’t skip whipping the egg white. That’s what keeps these light. Fold slowly and stop as soon as it’s incorporated — overmixing knocks the air out.

    Pan control. Too hot and the outside will burn before the centre cooks. Keep it medium and patient — that’s how you get the soft-set centre and golden crust.

    Batch trick. Keep cooked pancakes warm on a baking tray in a low oven (100°C fan) while you finish the rest. No stress, no cold stacks.

    Syrup upgrade. Warm your maple syrup before pouring. Cold syrup seizes the pancakes and dulls the texture. A few seconds in the microwave or in a small pan does the job.

    Fruit swaps. Blueberries, raspberries, strawberries — all work. Add sliced banana and a dusting of cinnamon for a richer, sweeter variation. Or go full luxury with poached pears and honey.

    Final thought

    These aren’t quick grab-and-go pancakes. They’re special. They’re soft, melting, and completely over the top in all the right ways. They don’t apologise for being rich or creamy or slow. They’re here to seduce — and they do. Cheesecake for breakfast? You’re damn right.

    Health stats (per serving)

    Each serving comes in at around 1,980kJ (470kcal), with 22g fat, 11g saturates, 10g sugars, and 0.8g salt. Expect roughly 14g protein, 38g carbohydrates, and 2g fibre — indulgent, satisfying, and worthy of a weekend.

    Disclaimer

    Every effort has been made to ensure the accuracy and clarity of this recipe. However, all individuals are responsible for verifying the ingredients, techniques, and methods they use. Always check packaging labels for the most up-to-date information regarding allergens, cross-contamination risks, and suitability for specific dietary needs, including gluten-free, nut-free, dairy-free, vegetarian, or vegan requirements.

    Nutritional information provided is estimated for guidance only and may vary depending on portion size, specific brands, or substitutions used. It should not be relied upon as medical or nutritional advice. If you have any allergies, intolerances, medical conditions, or dietary concerns, consult a qualified health professional before preparing or consuming any recipe on this site.

    By following this recipe, you acknowledge that you do so at your own risk. The site, its writers, and contributors are not liable for any adverse reactions, ingredient misinterpretations, or accidents in the preparation or consumption of any dishes.

    For full details, please refer to the site’s complete disclaimer and terms of use.

  • Bacon And Egg Breakfast Muffin

    Bacon And Egg Breakfast Muffin

    This isn’t breakfast — it’s a hunger demolition device. A golden, toasted muffin layered with deep-crackling smoked streaky bacon, sharp cheddar melting into the warm crumb, and a fried egg with a yolk so runny it should come with a warning. Every bite hits you with heat, crunch, salt, and flow. Forget the plastic breakfast sandwich in a drive-thru bag. This is real food. Real flavour. Real satisfaction. It’s breakfast you cook like you mean it. No shortcuts. No soft options. This muffin doesn’t whisper flavour — it detonates it. Get ready to level up your mornings with a build so bold it should come with a seatbelt.

    Ingredients

    Serves 1

    1 English muffin 2 rashers smoked streaky bacon 1 large free-range egg 1 slice mature cheddar cheese Pinch of fine sea salt

    Equipment needed

    Non-stick frying pan Fish slice or spatula Bread knife Toaster or grill Serving plate Kitchen paper Small prep board Serrated knife

    Step-by-step method

    1. Prep the muffin.

    Start by slicing the English muffin evenly in half using a serrated knife. Don’t tear it — clean, sharp cuts mean better toasting and even layers later. Lay the two halves face up so they’re ready to go straight into the toaster. Do this first — timing is everything.

    2. Toast it right.

    Drop the muffin halves into your toaster or place them cut-side-up under a hot grill. Toast for 90 seconds to 2 minutes, depending on heat source. You’re aiming for crisp, golden edges and a lightly browned face. Not burnt. Not pale. The crumb should be dry enough to hold molten cheddar without going soggy, but the base should still retain a bit of softness so the sandwich holds together. Once toasted, set the muffin aside, keeping the cut sides facing up to release steam.

    3. Crisp the bacon.

    Place a dry non-stick frying pan over medium-high heat. No oil. The bacon brings its own. Once the pan’s hot, lay in the two rashers of smoked streaky bacon flat. Don’t crowd them. Cook undisturbed for 3 minutes. You’ll hear the sizzle, see the fat rendering, and the edges start to curl. Flip with a spatula and cook the second side for another 3 minutes. Look for deep bronze colour, blistered fat, and those unmistakable crispy ripples. Remove and place on a sheet of kitchen paper to drain, keeping them as crisp and dry as possible. That texture is key — limp bacon ruins the build.

    4. Use the bacon fat.

    Don’t you dare wipe that pan. That bacon fat is flavour gold. Turn the heat down slightly to medium. Let the pan cool for about 30 seconds so you don’t scorch the egg.

    5. Fry the egg.

    Crack the egg directly into the pan. You should hear a low sizzle, not a scream — that means it’s the right temp. Immediately season with a small pinch of fine sea salt, concentrating it around the white. Let the egg cook, undisturbed, for 90 seconds. You want the white fully set — opaque and just beginning to blister at the edges — but the yolk must stay liquid. Watch the surface closely. If the whites are still jelly-like after 90 seconds, give it 15 more, but don’t overcook. The goal is a soft, hot yolk that breaks like lava.

    6. Build the base.

    Take the bottom muffin half and place it cut-side-up on a warm plate. While still hot, lay the slice of mature cheddar directly onto the muffin. Use a slice that covers from edge to edge. You want the corners just beginning to melt over the sides. The heat from the muffin will start the melt — no microwave cheating here.

    7. Stack the bacon.

    Place the two crisp bacon rashers straight over the cheddar. If your rashers are long, fold them slightly to build height. This creates a juicy middle bite and ensures the bacon stays central. The heat from the bacon will accelerate the cheddar melt and soak flavour into the muffin beneath.

    8. Crown it with the egg.

    Now, with precision, slide the fried egg from the pan onto the bacon. Use a fish slice or spatula and be slow — you do not want to break the yolk. The weight of the egg should rest dead centre, so when it’s bitten into, it floods evenly across the build.

    9. Seal the deal.

    Place the top half of the muffin on top, cut-side down. Press gently — not hard enough to break the yolk yet, just enough to fuse the layers and trap the heat inside. Let it sit for 30 seconds so everything settles into place. That steam helps finish melting the cheddar and warms the muffin throughout.

    10. Serve immediately.

    This sandwich waits for no one. Serve on a warm plate with a few sheets of paper towel underneath if you’re going handheld. No sauce. No garnish. This is about purity of flavour and pure satisfaction.

    Serving tips

    Pair with a strong mug of black coffee or a tart, freshly squeezed orange juice to cut through the richness. If you’re feeling bold, add a swipe of English mustard under the cheddar for heat, or a few drops of hot sauce on the egg before sealing the lid. Want to serve it brunch-style? Plate it with a knife through the middle and a small rocket salad on the side — but keep it simple. Let the muffin shine.

    Chef’s notes

    Bacon choice matters. Always go for smoked streaky bacon — the fat-to-meat ratio gives the best crisp and deepest flavour. Unsure about quality? Look for dark red rashers with good marbling.

    Egg timing is everything. Overcook it and you lose the signature run. Underdo it and you risk slime. You want a firm, clean white and a yolk that oozes like butter.

    Cheddar strength is critical. Use mature or extra mature cheddar. A milder cheese will melt, yes, but it won’t punch through the fat. Sharpness cuts the richness and binds everything together.

    Scaling up? Make four at once by grilling all muffin halves in the oven and baking bacon on a rack at 200°C (fan) for 15 minutes. Use a larger frying pan or two to cook multiple eggs side by side. Just don’t stack and rest too long — these need to be served hot and fresh.

    Customisation? Add a grilled tomato slice between the cheddar and bacon for sweetness. Swap bacon for grilled halloumi or avocado for a vegetarian version. Gluten-free? Use a GF English muffin and double-check your cheddar label.

    Batch prep advice. You can toast muffins ahead and crisp bacon in bulk. Store bacon in paper towels in an airtight container. Reheat in a dry pan to crisp. Eggs must always be cooked to order.

    For elite control: warm the plate before you start. Use tongs for stacking the bacon. Slice the muffin using a sawing motion. And never, ever use pre-grated cheese — it won’t melt properly due to anti-caking agents.

    Final thought

    This isn’t a breakfast, it’s a ritual. One crack of the yolk and you’ve got molten centre stage, cheddar sliding, bacon snapping, muffin holding its structure like a pro. Every layer engineered for punch, contrast, and flow. It’s what fast food wishes it could be. You made it yourself. You did it properly. You’re not just cooking — you’re commanding the kitchen. Now eat it before someone else tries to.

    Health stats (per serving)

    Each bacon and egg muffin delivers roughly 1,730kJ (415kcal) of energy, with 28g of fat, 12g of saturates, 1.3g of sugars, and 1.5g of salt. It contains around 26g of carbohydrates, 21g of protein, and 1.2g of fibre. It’s high in satisfaction and delivers long-lasting fuel, especially when paired with black coffee or a strong breakfast tea.

    Disclaimer

    Every effort has been made to ensure the accuracy and clarity of this recipe. However, all individuals are responsible for verifying the ingredients, techniques, and methods they use. Always check packaging labels for the most up-to-date information regarding allergens, cross-contamination risks, and suitability for specific dietary needs, including gluten-free, nut-free, dairy-free, vegetarian, or vegan requirements.

    Nutritional information provided is estimated for guidance only and may vary depending on portion size, specific brands, or substitutions used. It should not be relied upon as medical or nutritional advice. If you have any allergies, intolerances, medical conditions, or dietary concerns, consult a qualified health professional before preparing or consuming any recipe on this site.

    By following this recipe, you acknowledge that you do so at your own risk. The site, its writers, and contributors are not liable for any adverse reactions, ingredient misinterpretations, or accidents in the preparation or consumption of any dishes.

    For full details, please refer to the site’s complete disclaimer and terms of use.

  • Blueberry Lemon Pancakes

    Blueberry Lemon Pancakes

    These are the pancakes that make getting up worth it. Not those floppy, pale, forgettable stacks you get in a greasy spoon. These are thick, golden rounds of lemon-zested fluff loaded with bursting blueberries and dripping with maple syrup. Sharp. Sweet. Soft in the middle, crisp at the edge. The kind of breakfast that demands silence until the last bite.

    You’re working fast and loose with basics here — flour, egg, milk — but what makes these pancakes fly is the balance. The citrus zest electrifies the batter, while the blueberries pop like little flavour bombs. Then there’s the texture — airy and pillowy inside, with that golden shell that comes from just the right amount of heat and butter.

    Cooked in batches, stacked high, and drowned in syrup, they’re dangerously moreish. One stack and you’ll forget cereal ever existed. Make these once and you’ll never go back to boxed mixes again.

    INGREDIENTS

    (Makes 6–8 pancakes, serves 2 hungry or 3 polite people)

    150g plain flour 1 tablespoon caster sugar 1 teaspoon baking powder Pinch of fine salt 1 large egg 200ml whole milk Zest of 1 lemon (plus more for garnish) 1 small handful fresh blueberries (plus extra to serve) Butter, for greasing the pan Maple syrup, to serve

    EQUIPMENT NEEDED

    Large mixing bowl Medium jug or bowl for wet ingredients Whisk Non-stick frying pan or griddle Ladle or large spoon Spatula Microplane or fine grater Serving plates

    STEP-BY-STEP METHOD

    1. Combine the dry ingredients

    In a large bowl, whisk together the plain flour, caster sugar, baking powder, and a pinch of salt. Don’t just stir — whisk. You want everything evenly distributed and aerated before the wet ingredients hit.

    2. Mix the wet ingredients

    In a separate jug or bowl, crack in the egg and add the whole milk. Grate in the zest of one lemon using a microplane for maximum flavour. Whisk until smooth — this should look like a slightly foamy custard base.

    3. Bring the batter together

    Pour the wet mixture into the dry. Now whisk it gently, just until combined. Lumps are fine. In fact, a few lumps mean you haven’t overmixed it — and that’s what keeps the pancakes fluffy, not rubbery.

    Once combined, fold in the fresh blueberries using a spoon or spatula. Don’t crush them — just gently stir them through. If your berries are large, halve them for better distribution.

    4. Heat the pan

    Place a non-stick frying pan or griddle over medium heat. Give it time to get evenly hot — you want a consistent sizzle, not a scorched base. Lightly brush with butter just before the first pancake goes in. Too much and they’ll fry, not brown.

    5. Cook the pancakes

    Using a ladle or large spoon, pour batter into the hot pan — about one ladle per pancake. Leave plenty of space between them. Cook for 2 minutes or until you see bubbles rising and edges starting to set.

    Flip confidently and cook the other side for 1–2 minutes more until golden and cooked through. Adjust the heat if they’re browning too quickly before cooking inside.

    Transfer cooked pancakes to a warm plate and cover lightly with foil. Repeat with the rest of the batter, brushing with a little more butter between batches if needed.

    6. Stack and serve

    Stack the pancakes high on warm plates. Scatter over extra fresh blueberries. Drizzle generously with maple syrup. Grate a final dusting of lemon zest over the top for punch. Serve immediately — hot, golden, and unapologetically indulgent.

    SERVING TIPS

    Serve straight away while they’re hot and fluffy. Add a dollop of yoghurt or a smear of lemon curd if you want to push the citrus. Want crunch? Toasted almonds or granola bring texture. Coffee on the side is mandatory.

    Feeding more? Double the recipe and keep batches warm in a low oven (around 100°C) on a lined baking tray.

    CHEF’S NOTES

    The batter:

    Don’t overmix. A few streaks of flour are fine. Over-whisking develops gluten, and gluten kills fluffiness. Lumps disappear during cooking — trust the process.

    The blueberries:

    Fresh berries are best — they burst gently as the pancakes cook. If using frozen, don’t defrost. Just toss them in a little flour before folding in. That stops them from bleeding purple streaks through your batter.

    The lemon zest:

    This is the twist that lifts the whole stack. Zest adds brightness without watering down the batter like juice would. Use a microplane for maximum oil release — that’s where the flavour lives.

    The pan:

    Non-stick is crucial. If you’re using stainless steel, you’ll need more butter and a little more finesse. Keep the heat medium — too hot and the outside burns before the inside sets.

    Make it your own:

    Swap blueberries for raspberries, chopped strawberries, or even dark chocolate chips. Add a teaspoon of vanilla extract to the batter for extra warmth. Want them dairy-free? Use oat milk and coconut oil instead — still fluffy, still banging.

    Batch tip:

    Make a double batch and freeze extras. Once cooled, layer with baking paper and freeze in a bag or container. Reheat in a toaster or dry pan — they spring back like magic.

    FINAL THOUGHT

    This is breakfast that shows up with intention. No sad oats. No beige cereal. Just golden, citrus-spiked fluff with pockets of sweet berry brilliance and syrup cascading down the sides like liquid gold.

    These pancakes aren’t just a morning meal — they’re a reason to get out of bed. And once you’ve mastered them, you’ll never settle for second-best again.

    HEALTH STATS (per serving, 3–4 pancakes with syrup)

    Energy: around 1900kJ (approx. 460kcal)

    Fat: 16g

    Saturates: 6g

    Sugars: 14g

    Salt: 0.6g

    Carbohydrates: 60g

    Protein: 10g

    Fibre: 3g

    DISCLAIMER

    Every effort has been made to ensure the accuracy and clarity of this recipe. However, all individuals are responsible for verifying the ingredients, techniques, and methods they use. Always check packaging labels for the most up-to-date information regarding allergens, cross-contamination risks, and suitability for specific dietary needs, including gluten-free, nut-free, dairy-free, vegetarian, or vegan requirements.

    Nutritional information provided is estimated for guidance only and may vary depending on portion size, specific brands, or substitutions used. It should not be relied upon as medical or nutritional advice. If you have any allergies, intolerances, medical conditions, or dietary concerns, consult a qualified health professional before preparing or consuming any recipe on this site.

    By following this recipe, you acknowledge that you do so at your own risk. The site, its writers, and contributors are not liable for any adverse reactions, ingredient misinterpretations, or accidents in the preparation or consumption of any dishes.

    For full details, please refer to the site’s complete disclaimer and terms of use.

  • Smashed Avocado Toast With Poached Eggs

    Smashed Avocado Toast With Poached Eggs

    This is not a polite breakfast. This is not some sad, token slice of avocado slapped on cardboard bread with a half-hearted egg dumped on top. This is rich. Silky. Loud. A power move disguised as breakfast. You’re taking thick-cut sourdough, toasting it to golden, rustling perfection, smashing buttery ripe avocado with lemon and sea salt, then crowning it with perfectly poached eggs that explode like golden lava when pierced. Finished with chilli flakes and a drizzle of oil — because bland breakfasts are a crime.

    This is the kind of dish that shuts people up mid-bite. The crunch of the toast, the richness of the yolk, the creamy avocado laced with lemon and cracked pepper — every element has a job. No filler. No fluff. Just balance and boldness.

    It’s a dish that only takes ten minutes, but when you do it properly — when every detail is dialled in — it feels like luxury. Like a late brunch in a tucked-away café that knows what it’s doing. This is how you start the day with teeth.

    INGREDIENTS

    (Serves 2)

    2 thick slices of good-quality sourdough 2 large fresh eggs 1 ripe avocado 1 teaspoon lemon juice Sea salt, to taste Freshly cracked black pepper, to taste Chilli flakes, to finish Extra virgin olive oil, for drizzling 1 tablespoon white vinegar (for poaching water)

    EQUIPMENT NEEDED

    Toaster or griddle pan Small saucepan (for poaching) Slotted spoon Mixing bowl Fork or potato masher Paper towels Serving plates

    STEP-BY-STEP METHOD

    1. Toast the bread

    Start with proper bread. Not floppy supermarket slices. Real sourdough. Something with structure and chew. Slice it thick — at least 1.5cm. Toast until the edges go golden and the centre crisps up but still has bite. A toaster works. A hot dry pan works better. Get some colour on it.

    Once toasted, set the slices aside on warm plates. You want them ready for the toppings — no time to mess about once the eggs are cooked.

    2. Heat your poaching water

    Fill a small saucepan with water and bring it to a gentle simmer. You’re not boiling here. You want movement in the water, not chaos. Add a splash of white vinegar — about a tablespoon. This helps the egg whites coagulate quickly, wrapping the yolks in that classic teardrop shape.

    3. Prep your eggs

    Crack each egg into a small cup or ramekin. This gives you control when adding them to the water. Fresh eggs are essential — older eggs spread out and look like ghosts. The yolk should sit proud and high. If it doesn’t, bin it and grab another.

    4. Poach the eggs

    Once the water is gently simmering, use a spoon to swirl it into a vortex. This helps wrap the white around the yolk.

    Lower one egg into the centre of the swirl. Then wait. Don’t touch it. Give it exactly 3 minutes — set a timer. The white will set while the yolk stays rich and runny.

    Lift it out with a slotted spoon and rest on kitchen paper to drain. Repeat with the second egg. Poach them separately if you’re not confident — better one perfect than two tangled messes.

    5. Smash the avocado

    In a bowl, scoop out the flesh of a ripe avocado. It should yield slightly to pressure — no rock-hard underripe nonsense. Add a good squeeze of lemon juice, a pinch of flaky sea salt, and a few turns of black pepper.

    Now mash. Not too smooth — you want texture. Fork marks. Chunks. It should look rustic and intentional, not like baby food. Taste and adjust the seasoning. A touch more lemon? Go for it. This is your base layer — make it sing.

    6. Build the toast

    Spread the smashed avocado generously across the toasted sourdough. Don’t be stingy. Cover edge to edge. Let it pile up a little in the centre. Texture is your friend here.

    Now crown each slice with a poached egg. Gently place it — don’t plonk. That yolk is precious.

    7. Finish strong

    Sprinkle over a pinch of chilli flakes for heat and edge. Then drizzle with high-quality extra virgin olive oil. Don’t overdo it — just enough to glisten and add richness.

    Now stand back. Admire the contrast. Crisp toast, green avocado, golden egg, red chilli. Then crack that yolk and let it flood. That’s breakfast done properly.

    SERVING TIPS

    Serve immediately, while the toast is hot and the yolk is still runny. Don’t wait. This dish waits for no one. Pair with black coffee or a sharp green juice to cut the richness. Want to elevate? Add a few pickled red onions, a crumble of feta, or even a strip of crispy bacon if you’re bending the rules.

    CHEF’S NOTES

    The toast:

    Good bread is everything. Sourdough gives chew, tang, and holds up under pressure. A seeded rye or thick-cut wholegrain also works. Just don’t go soft. You need structure to handle the toppings.

    The avocado:

    Use ripe, not overripe. If it’s too soft and starting to brown, bin it. Add lemon to preserve colour and cut through the richness. Want extra zing? Add a teaspoon of finely chopped fresh herbs like coriander or chives.

    The eggs:

    Freshness is non-negotiable. The older the egg, the more it spreads. If in doubt, crack it into a sieve to remove excess watery whites before poaching. Three minutes is the sweet spot for runny yolks. If you like them firmer, go to four.

    The finish:

    Chilli flakes add heat, but use restraint — you want sparkle, not fire. Olive oil adds richness, but only if it’s good quality. Sharp, peppery oil brings it home.

    Make it your own:

    Swap lemon for lime for a twist. Add grilled tomatoes or roasted mushrooms on the side. Or go all out with truffle oil and shaved parmesan for a proper indulgent brunch.

    Meal prep tip:

    Avocado mash can be made an hour ahead if you cover it with cling film directly touching the surface. Eggs can be poached ahead and reheated in warm water for 30 seconds before serving.

    FINAL THOUGHT

    This is how you take a simple concept and elevate it through detail. Every part of this dish is intentional. The toast has crunch. The avocado brings cream and tang. The egg adds richness and theatre. And when it all comes together, it’s not just breakfast. It’s a statement.

    Once you’ve nailed this, you’ll never look at a café brunch menu the same way again. Why pay fifteen quid when you can do it better at home — with more attitude and flavour to boot?

    HEALTH STATS (per serving)

    Energy: around 1800kJ (approx. 430kcal)

    Fat: 28g

    Saturates: 5g

    Sugars: 2g

    Salt: 0.8g

    Carbohydrates: 27g

    Protein: 14g

    Fibre: 6g

    DISCLAIMER

    Every effort has been made to ensure the accuracy and clarity of this recipe. However, all individuals are responsible for verifying the ingredients, techniques, and methods they use. Always check packaging labels for the most up-to-date information regarding allergens, cross-contamination risks, and suitability for specific dietary needs, including gluten-free, nut-free, dairy-free, vegetarian, or vegan requirements.

    Nutritional information provided is estimated for guidance only and may vary depending on portion size, specific brands, or substitutions used. It should not be relied upon as medical or nutritional advice. If you have any allergies, intolerances, medical conditions, or dietary concerns, consult a qualified health professional before preparing or consuming any recipe on this site.

    By following this recipe, you acknowledge that you do so at your own risk. The site, its writers, and contributors are not liable for any adverse reactions, ingredient misinterpretations, or accidents in the preparation or consumption of any dishes.

    For full details, please refer to the site’s complete disclaimer and terms of use.